

Getting a custom character or prop into Source Filmmaker can be surprisingly frustrating. A model that looks perfect in Blender may appear invisible in SFM, show purple-and-black textures, lose its animations, or fail during compilation with an unclear error.
The missing link is usually the sfm compile process. Source Filmmaker does not directly use most raw files created by modern 3D applications. Models, materials, animations, and maps need to be prepared in formats the Source engine understands and, where required, processed with Source-specific tools.
Quick answer: sfm compile is the workflow of preparing and converting custom assets for Source Filmmaker. For models, that normally means exporting geometry and animation as SMD or DMX, describing the model in a QC script, and compiling it with StudioMDL—often through Crowbar—to produce Source model files such as MDL, VVD, and VTX.
What Does sfm compile Mean?
Source Filmmaker, commonly shortened to SFM, is Valve’s filmmaking and animation software built around Source-engine technology. Its content pipeline uses specialized tools and formats rather than treating an FBX, OBJ, PNG, or Blender project as a finished game asset.
That distinction explains what compiling actually does.
A typical model begins in software such as Blender, Maya, or 3ds Max. It may contain:
- Mesh geometry
- UV coordinates
- Materials
- Bones and a skeleton
- Vertex weights
- Animations
- Collision geometry
Those elements must be organized into files and instructions that Source’s model compiler can process.
For model compilation, the central compiler is StudioMDL. Valve’s documentation describes StudioMDL as the Source model compiler and states that its required input is a QC file.
The general pipeline looks like this:
3D application → SMD/DMX source files → QC script → StudioMDL → compiled Source model
Afterward, materials are placed in the appropriate material directories so SFM can resolve the model’s texture references.
This is why copying an ordinary .fbx or .obj into an SFM models directory usually does not accomplish what a newcomer expects.
What Files Are Used During sfm compile?
Understanding the file types makes troubleshooting much easier because each one has a different job.
| File | Purpose |
|---|---|
.QC | Build instructions interpreted by StudioMDL |
.SMD | Source mesh, skeleton, or animation data |
.DMX | Valve’s Data Model Exchange format |
.MDL | Main compiled model file |
.VVD | Vertex data used by a compiled model |
.VTX | Optimized mesh/rendering information |
.PHY | Physics/collision information when applicable |
.VTF | Valve Texture Format texture |
.VMT | Material definition used by Source |
.VMF | Editable Hammer map source |
.BSP | Compiled Source map |
A useful mental model is to separate source files from runtime files.
Files such as QC, SMD and VMF are primarily authoring inputs. MDL and BSP are examples of compiled content that the engine can load.
SMD vs. DMX
SMD is one of the best-known formats in the Source modding workflow. It can carry mesh, skeletal and animation information.
DMX is another format supported by Source tools. Which one makes more sense depends on your exporter, asset and workflow.
Valve’s QC documentation notes that StudioMDL can look for several supported source formats when resolving model references, including SMD and DMX.
For a first model, the important point is not choosing the most sophisticated format. It is making sure your exporter, QC references and compiler all agree on the files being used.
The Role of the QC File in sfm compile
The QC file is one of the most important pieces of model compilation.
Think of it as a build recipe.
Your mesh contains the actual model data, but StudioMDL still needs instructions describing what to build and how the pieces fit together. Those instructions are written as QC commands.
Valve’s QC documentation provides a simple model example using commands such as $modelname, $body, $surfaceprop, $cdmaterials, $sequence, and $collisionmodel.
A simplified example could look like this:
$modelname "custom/robot.mdl"

$body body "robot_reference"

$surfaceprop "metal"

$cdmaterials "models/custom/robot"

$sequence idle "robot_idle"

$collisionmodel "robot_collision"
{
    $concave
}
The exact QC needed for a production model can become considerably more complicated, but this illustrates the structure.
$modelname
$modelname defines the model’s compiled name and output location within the model path.
For example:
$modelname "custom/robot.mdl"Path mistakes here can make a successful compile look like a failure because the model ends up somewhere other than where you expected it.
$body and $model
These commands reference model geometry.
A simple prop may only require a straightforward body definition. More advanced character setups can require different commands and options depending on the desired functionality.
$cdmaterials
$cdmaterials tells the model where its materials should be found.
It does not embed every texture image directly inside the MDL.
That distinction matters because a model can compile successfully and still appear with missing materials in Source Filmmaker.
$sequence
A Source model normally needs sequence information.
For an animated character, sequences may point to exported animation data. For a static model, a reference mesh can sometimes be reused for a basic idle sequence, as demonstrated in Valve’s QC example.
$collisionmodel
This defines collision geometry when the model requires it.
Not every SFM asset needs sophisticated physical collision. Avoid making a collision mesh unnecessarily complicated just because the visible model has high geometric detail.
How to sfm compile a Model Step by Step
The easiest way to understand model compilation is as a pipeline rather than a single Compile button.
1. Prepare the Model in Blender or Another 3D Application
Start by cleaning the source asset.
Check:
- Model scale
- Rotation and transforms
- Mesh normals
- UV mapping
- Bone hierarchy
- Vertex weights
- Material assignments
- Animation data
- Object names
A messy source model creates problems later that can easily be mistaken for compiler errors.
For rigged characters, pay particular attention to bone relationships and weights. Compilation cannot magically repair a fundamentally broken armature.
2. Prepare the Material Assignments
Before exporting, give materials predictable names.
Suppose your character uses:
robot_body
robot_head
robot_eyes
Keeping those names consistent makes it much easier to connect the exported mesh with corresponding Source materials.
Avoid chaotic names, duplicate materials and unnecessary slots.
3. Export the Mesh
Export the model to a Source-compatible intermediate format supported by your workflow, commonly SMD or DMX.
For a character, you may end up with separate files for:
- Reference mesh
- Idle animation
- Other animation sequences
- Collision mesh
A simple directory might look like:
robot_source/
    robot.qc
    robot_reference.smd
    robot_idle.smd
    robot_collision.smd
The exact structure is flexible. Consistency is what matters.
4. Create the QC Script
Create a plain-text QC file and define your model.
Start small.
A frequent beginner mistake is copying a huge QC file from an advanced character and changing a few names. That introduces commands you may not understand and makes errors much harder to isolate.
Get the simplest possible model compiling first. Then add features such as:
- Additional sequences
- Bodygroups
- Alternate skins
- Attachments
- Hitboxes
- Physics
- LODs
- IK configuration
Valve maintains a dedicated QC command reference covering fundamentals and more advanced features.
5. Compile with StudioMDL
StudioMDL is the actual Source model compiler.
At its simplest, its syntax is:
studiomdl [options] <path\QC>The QC file is the required model-building input. StudioMDL also provides options for debugging and verification, including reporting bone information and checking a model without writing the final output.
Direct command-line compilation is useful because it helps you understand what is really happening.
For everyday work, however, many Source creators use a graphical front end.
Using Crowbar for sfm compile
Crowbar’s official Steam community page is a widely used Source-engine modding utility that provides interfaces for tasks including model compilation and decompilation. Its compile feature uses the studiomdl.exe supplied by the selected game’s authoring tools or SDK.
Crowbar does not replace the underlying Source compiler.
It makes StudioMDL easier to configure and use.
A basic Crowbar workflow is:
- Configure Source Filmmaker as the target game.
- Open the Compile section.
- Select your QC file.
- Confirm the correct game/compiler configuration.
- Start compilation.
- Read the compile log.
- Locate the generated model.
- Test it inside SFM.
Crowbar can also write compile logs, compile multiple QC files, open the output directory and recompile selected models.
Why the Correct Game Configuration Matters
Source-engine games do not necessarily use identical tool builds or content configurations.
If you are building specifically for Source Filmmaker, use the appropriate SFM game configuration rather than randomly pointing the tool toward another Source game’s compiler.
When something inexplicable happens, verify the toolchain before rewriting the asset.
Understanding the Compiled Model Files
A successful model compile can generate several related files.
The .mdl gets most of the attention because it is the recognizable model filename, but you should treat the compiled model as a package rather than assuming MDL alone contains everything.
Depending on the model and branch, supporting files can include vertex, optimized rendering and physics information.
That leads to a practical rule:
Do not copy only the MDL when moving a compiled model.
Keep its associated compiled files together.
If a model works in one content folder but breaks after you manually move it elsewhere, check whether all supporting files were transferred.
Textures and Materials: Why Models Turn Purple and Black
One of the classic Source-engine problems is a model covered in purple-and-black checkerboards.
This usually points toward a material or texture resolution problem rather than automatically proving the mesh compilation failed.
Source materials commonly involve two key files:
VTF — Valve Texture Format
This contains texture image data used by Source.
VMT — Valve Material Type
This text-based material definition tells the engine how the material should behave and which texture resources it should use.
A minimal material might conceptually resemble:
"VertexLitGeneric"
{
    "$basetexture" "models/custom/robot/robot_body"
}
The path must correspond to where the texture actually exists beneath the materials directory.
$cdmaterials and VMT Paths Must Agree
Suppose your QC contains:
$cdmaterials "models/custom/robot"Your material structure must make sense relative to that location.
A common failure chain is:
- Mesh material name is
robot_body. - QC searches the wrong material directory.
robot_body.vmtexists somewhere else.- The VMT itself references an incorrect VTF path.
- SFM cannot resolve the material.
- The model appears checkerboarded.
When textures fail, trace the path one step at a time instead of repeatedly recompiling the mesh.
How to Use Multiple Skins
Source models can support alternate material sets.
The QC command $texturegroup is designed for this purpose. Valve’s documentation explains that it lets a model have multiple skins made from one or more materials.
For example, one character could have:
- Default clothing
- Red clothing
- Blue clothing
without requiring three completely separate character models.
This is useful when the geometry and skeleton stay identical but appearance changes.
Valve’s documentation also notes that StudioMDL has a hard-coded limit of 32 unique materials for a model, so material organization matters on complex assets.
Compiling Animations for Source Filmmaker
Animation compilation uses the same overall model pipeline but introduces additional considerations.
Your animation data needs to match the skeleton expected by the compiled model.
Check:
- Bone names
- Bone hierarchy
- Reference pose
- Frame range
- Frame rate
- Root motion
- Export settings
A sequence can then be declared through the QC.
For example:
$sequence idle "robot_idle" fps 30More sophisticated sequences can require additional options, blending, activity definitions or other QC commands.
Why Bones Sometimes Disappear
StudioMDL may optimize bones that appear unnecessary.
This becomes especially relevant with animation-only models or specialized rigs. Valve documents $definebone as a QC command that can explicitly define bones, including situations where bones might otherwise be optimized out because they are not attached to geometry or attachment points.
That does not mean $definebone should be added to every model.
Use it when the rig and intended model structure actually require it.
sfm compile for Custom Maps
The phrase sfm compile can also refer to map compilation.
This is a different process from model compilation.
Maps are generally authored in Hammer and saved as VMF files. Source’s map toolchain then produces the BSP that the engine loads.
The three names you will encounter constantly are:
| Tool | Main job |
| VBSP | Builds the BSP structure and map geometry |
| VVIS | Calculates visibility |
| VRAD | Calculates/bakes map lighting |
Valve’s Source documentation identifies Hammer as the map editor, StudioMDL as the model compiler, and VBSP, VVIS and VRAD among the map compilation tools.
VBSP
VBSP processes the map’s structural information and creates the foundation of the BSP.
Errors at this stage often indicate fundamental map problems.
VVIS
VVIS calculates visibility information.
The purpose is not simply visual appearance. Visibility calculations help the engine determine what potentially needs to be rendered from different areas of the map.
Valve’s documentation describes VVIS as determining what is visible from within visibility leaves so unnecessary objects can be hidden and performance improved.
VRAD
VRAD handles baked lighting.
It processes light information to produce the static lighting that gives a compiled environment much of its final appearance.
The simplified map pipeline is therefore:
VMF
 ↓
VBSP
 ↓
VVIS
 ↓
VRAD
 ↓
BSP
Do not confuse this with:
SMD/DMX + QC
 ↓
StudioMDL
 ↓
MDL
They are separate compilation workflows.
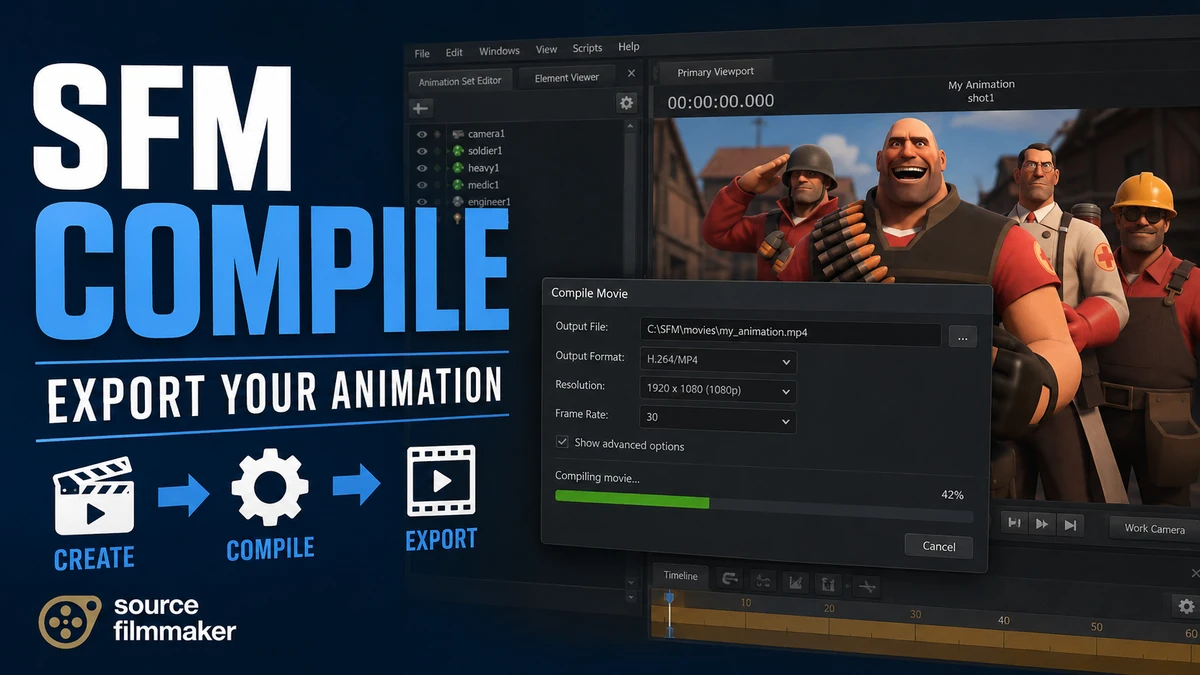
Is Rendering an SFM Movie the Same as Compiling?
Not really.
Some online articles use “compile” loosely to describe exporting or rendering a finished animation. That terminology can create unnecessary confusion.
Rendering a movie means taking your SFM scene—camera, animation, lights and other scene elements—and generating final frames or video output.
Asset compilation happens earlier.
A clearer workflow is:
Create asset → compile asset → load asset into SFM → animate scene → render/export final output
If someone asks why their custom model will not appear, they are probably dealing with asset compilation.
If they are asking how to turn a completed animation into a movie, they are dealing with rendering/export.
Keeping those concepts separate makes tutorials and troubleshooting far easier to follow.
Common sfm compile Errors and How to Fix Them
Compilation errors are usually easier to solve when you categorize them rather than trying random fixes.
Model Cannot Be Found
If compilation succeeds but the asset does not appear where expected, check:
$modelname- Target game
- Output directory
- Search paths
- Folder names
- Whether all compiled files were copied
First establish where StudioMDL actually wrote the model.
StudioMDL Cannot Find the SMD or DMX
Check the QC reference carefully.
Confirm:
- File exists
- Filename is correct
- Relative path is correct
- Export actually completed
- File is readable
Valve’s QC documentation specifically notes that the .smd extension should normally be omitted from mesh and animation names in QC references because including it can cause StudioMDL to fail to load the file in relevant workflows.
So if you have:
$body body "robot_reference.smd"and encounter loading trouble, compare your syntax against the documented form:
$body body "robot_reference"Model Has Missing Textures
If geometry loads but displays checkerboards:
- Check the mesh’s material name.
- Check
$cdmaterials. - Confirm the matching VMT exists.
- Open the VMT.
- Check its
$basetexturepath. - Confirm the referenced VTF exists.
- Check spelling and directory structure.
Do not immediately blame StudioMDL.
A successful model compile does not guarantee that every material reference is valid.
Model Appears Invisible
Possible causes include:
- Incorrect scale
- Bad mesh export
- Incorrect output path
- Broken material setup
- Model outside the expected location
- Geometry problems
- Incorrect bone or transform setup
Load the model in a model-viewing tool when available. That helps separate an asset problem from an SFM scene problem.
Model Is Huge or Tiny
This usually starts before compilation.
Check scale and export settings in your 3D application. Fixing the source asset generally produces a cleaner workflow than trying to compensate for inconsistent scale later.
Rig Is Distorted
Look at:
- Applied transforms
- Bone hierarchy
- Weight painting
- Reference pose
- Export settings
- Renamed or missing bones
Test a simple reference mesh before adding a large animation library.
Compile Produces Warnings but Still Finishes
A warning is not always fatal.
StudioMDL distinguishes between information, warnings and errors, and it provides command-line options related to warning output and debugging.
Do not ignore the log, but do not assume every warning means the model is unusable either.
Read what the compiler actually reports and test the result.
A Better Troubleshooting Method
The fastest way to fix sfm compile problems is to reduce the number of variables.
Use this order:
- Verify the source mesh.
- Verify the exported SMD or DMX.
- Simplify the QC.
- Confirm the correct StudioMDL/game configuration.
- Compile and read the complete log.
- Verify the generated files.
- Test the model without complex materials.
- Fix material paths.
- Add animations.
- Add advanced QC features one at a time.
This approach is much more reliable than changing the mesh, QC, textures and compiler configuration simultaneously.
If four things change and the model suddenly works, you still do not know which one fixed it.
Practical Folder Organization
A clean workspace prevents a surprising number of errors.
For example:
project/
├── source/
│   ├── robot.qc
│   ├── robot_reference.smd
│   ├── robot_idle.smd
│   └── robot_collision.smd
│
├── textures/
│   ├── robot_body_source.png
│   └── robot_head_source.png
│
└── notes/
    └── compile_notes.txt
Inside the actual Source Filmmaker content structure, keep runtime assets organized separately under their expected models and materials locations.
Avoid dumping every custom asset into one folder.
Once you have dozens of characters and hundreds of materials, descriptive project-specific directories become invaluable.
Advanced QC Features Worth Learning
Once your first model works reliably, QC offers considerably more control.
Bodygroups
Bodygroups allow parts of a model to be switched.
They are useful for removable accessories, alternate clothing pieces and optional geometry.
LOD Models
Level of Detail models reduce geometric complexity at greater viewing distances.
For many SFM-only projects, extreme runtime optimization may not be as important as it is in a real-time game, but understanding LODs remains useful when working with Source assets.
Hitboxes
Hitboxes define regions associated with the model’s skeleton and gameplay-oriented interactions.
They are more important in game development than in many purely cinematic SFM workflows, but you will encounter them when examining existing Source models.
Attachments
Attachments provide named points that other systems can reference.
They can be useful for items, effects and model-specific positioning.
Alternate Materials
As discussed earlier, $texturegroup allows multiple skins without duplicating the entire model.
Bone Control
More advanced models may need explicit bone definitions or other skeletal QC commands.
Learn these only after understanding the reference mesh and basic skeleton pipeline. Adding advanced bone configuration to an already broken export usually makes debugging harder.
Crowbar vs. StudioMDL: Which Should You Use?
There is no need to treat them as competing compilers.
StudioMDL performs the model compilation.
Crowbar provides a convenient interface around game-specific compilation tools. Its documented feature set includes compiling with the studiomdl.exe installed with a game’s authoring tools or SDK.
| Feature | StudioMDL | Crowbar |
| Actual Source model compiler | Yes | Uses StudioMDL |
| Command-line control | Yes | GUI-focused workflow |
| QC compilation | Yes | Yes |
| Compile log access | Yes | Yes |
| Batch convenience | Manual/scriptable | Built-in options |
| Beginner friendliness | Moderate | Generally easier |
| Useful for understanding internals | Excellent | Good |
For most beginners, Crowbar offers the easier entry point.
Learning basic StudioMDL syntax is still worthwhile because it explains what Crowbar is actually invoking and makes troubleshooting less mysterious.
Mistakes That Make sfm compile Harder Than It Needs to Be
Several habits repeatedly create unnecessary problems.
Starting With a Highly Complex Character
Do not make your first test a character with dozens of materials, facial flexes, hundreds of bones and a large animation library.
Start with a simple prop or stripped-down character.
Copying QC Files Without Understanding Them
Existing Source models are excellent references, but blindly copying a QC can bring along commands that have nothing to do with your asset.
Build the minimum working QC first.
Ignoring the Compile Log
The compiler log is not background noise.
It is one of your primary debugging tools.
Crowbar can display compile progress and logs, while StudioMDL itself exposes multiple diagnostic options.
Changing Everything at Once
If a compile fails, change one logical thing and test again.
That creates a repeatable debugging process.
Treating Material Errors as Model Errors
A checkerboard model can have perfectly valid geometry.
Test geometry and materials as separate layers of the pipeline.
Using the Wrong Toolchain
Verify the target game and compiler paths before spending hours editing the model.
Crowbar requires the game’s own authoring tools or SDK and its corresponding studiomdl.exe for model compilation.
A Reliable sfm compile Workflow
Once everything is configured, a repeatable workflow can be quite straightforward:
Prepare → Export → Define → Compile → Inspect → Test → Refine
Prepare the mesh, rig, UVs and materials in your 3D application.
Export the necessary model and animation data.
Define the model using a clean QC file.
Compile through the appropriate StudioMDL configuration, directly or with Crowbar.
Inspect the compiler log instead of merely checking whether files appeared.
Test the resulting model before adding complexity.
Then refine animations, physics, skins, bodygroups and other features.
That order matters.
It separates asset creation from engine integration and gives you a clear place to look when something breaks.
Final Thoughts on sfm compile
The sfm compile workflow feels complicated mainly because Source Filmmaker separates tasks that newer 3D engines often hide behind automated import systems. Once you understand those layers, the process becomes far more predictable.
For models, remember the core chain: prepare your asset, export compatible source data such as SMD or DMX, define it with a QC script, and compile it with StudioMDL—directly or through a tool such as Crowbar. QC controls how the model is built, while VMT and VTF files handle the material side of the asset.
Maps follow a different path: Hammer’s VMF source is processed through tools such as VBSP, VVIS and VRAD to produce a BSP. Rendering a finished SFM animation is another separate stage entirely.
If you are learning the process for the first time, start with one simple model and a minimal QC. Get that asset compiling, loading and displaying correctly before introducing complex rigs, skins, collision models or animation sets. That small, controlled workflow teaches more about Source’s asset pipeline than repeatedly troubleshooting a complicated model with dozens of possible failure points.
